Wednesday, July 31, 2013

Best Homemade Burgers!

My hubby has a serious weakness for a yummy hamburger! Especially when its been homemade. I'm also always trying to find ways to impress my hubby with my cooking abilities, so I set out on Pinterest for one I thought looked delicious! I found it, tried it, and it was delicious! So thank you to Ashley, from Little Miss Mama blog. I did have all the ingredients her burgers called for but I also have some of my own flavors that I really like, so I took her recipe and made it a little bit more fitting for my family.

Here is how I made the burgers...

First, you need the following ingredients:


  • 2 lbs ground beef (its best to use 85/15 so you have enough fat in the meat to hold it together)
  • 1/4 cup bbq sauce
  • 1/2 cup shredded Tillamook Mexican cheese (half pepper jack & medium cheddar cheese)
  • 2 Tablespoons of McCormick's Hamburger seasoning (seasoning includes: salt, black pepper, chili pepper, onion, red bell peppers, sugar, garlic and natural flavors.)
  • Sliced cheddar cheese
  • Hamburger buns
(Litte tip: You don't ever want to add an egg or bread crumbs to make your hamburgers... unless you like your burger to taste like meatloaf.)


Directions: Combine ground beef, bbq sauce, shredded cheese and Hamburger seasoning. Form into 1 inch thick (or more) patties. I like to make mine fairly large around because they shrink down when cooking. I throw the hamburger patties on my pancake griddle (yikes I know) because I don't have a grill. Use what you got is my motto. Keep in mind, these are hamburgers that are meant to be made inside, not on your bbq grill due to the fact that they will fall apart.

Make sure your griddle is nice and hot when you first put them on and then turn it down to about medium to medium high. It took about 4 minutes on each side. Just make sure you don't burn them.


While the burgers are grilling, whip up the yummy secret sauce to go with it. This recipe also comes from the Little Miss Mama blog. It taste pretty darn close to Inn & Outs sauce. Yum!


 Here's what you need: 
 1 teaspoon Johnny's seasoning salt (or your preferred brand)
3/4 cup Mayo
1/4 cup Ketchup
1/4 cup Relish (I used sweet relish)
2 Tablespoons Worcestershire Sauce

Mix it all together and taste it. If it needs a little more of something, add it. 


Another thing you should do while grilling the burgers is butter your hamburger buns and set them in the broiler to be toasted. It adds a little extra something to your hamburgers and keeps your bread from getting soggy.


Now the best part... add all the toppings you like.
I melted a slice of cheese on top with lettuce, tomato, and onion. If I had it, I would have added avocado and bacon. YUM! Put your own spin on it and enjoy!!! 


If you're looking for an all american meal, check out our Apple Crisp Pie for dessert!

I hope you enjoy the Burgers as much as we did!


Friday, July 19, 2013

Author Spotlight: Heidi Ashworth!


I love to read! My favorite books to read are from the Regency Era (clean books only).  I'm a huge fan of anything Jane Austen; movies, books, history... etc. So I was excited when I came across  Heidi Ashworth's books by looking up books in the Regency Era that I have already read and liked.  For tips on finding the next good book to read via Amazon and books you have already read, view my Tutorial:  HERE. 


I am definitely a fan of Heidi Ashworth’s writing style. If you like Pride and Prejudice, then you will love her (Miss Delacourt) books. There is a little bit of everything as far as intrigue, romance (the clean kind), and even humor. 


Today I'm giving a review on her most recent book release: 

Lord Haversham Takes Command


This book is the 4th installment of her Miss Delacourt books, but if you have not read the previous books, in no way will you be lost (though I highly recommend them). This is a romantic story between Mira and Harry,  children from the main characters from the previous Miss Delacourt books. 

I laughed out loud at the character that Harry would portray (Bertie) in order to keep his status as a secret service agent under wraps. Everyone who knows him is confused and put out by his role as a dandy wearing too much lace. Even Mira, who hasn’t seen Harry in years is confused and disappointed. Harry is torn between the safety of those around him and loosing the good opinion of Mira and her parents for good. Mira, however, gets glimpses of the Harry she has always known and loved and has enough trust in him and his reasons for playing a dandy. Although there are times her trust is put to the test.

You can’t help but root for Harry and Mira to be together with the well described chemistry that they share. I won’t elaborate on the story anymore so as not to give anything away, however, there was a kissing scene that should go down in history for being the best kiss ever described in a book to make any woman's toes curl. I give mad props to Heidi Ashworth for her writing style and being able to describe a great kiss in the cleanest way. 

This book will make you fall in love with the Regency Era and make you want to buy the previous Miss Delacourt books just to know the history of some of the key characters. Thank you Heidi for a very entertaining read! I can’t wait to see what you come up with next!

** If you are interested in reading any of the above mentioned books, simply click on the picture and it will take you to the book on Amazon.


coming up on the blog... The best homemade Burgers! 


Monday, April 29, 2013

Avocado Hair Mask

It's no secret Nicole and I like to hang out. We sometimes make the hubby's think it's all about golfing, "Hey Hun, you want to go up to Tim and Nicole's this weekend and you guys can go golfing?" Victory! 
This past Saturday morning revolved around Maple Bars and an Avacado hair mask. It was better than it sounds. 
I found this recipe on Pinterest, naturally. You can find it here.

First you're going to blend up your goods, and hopefully have a BFF you can split the magic with.  Just make sure to double the recipe.

1 Ripe Avacado
1 TBSP Olive Oil
1 TBSP Apple Cider Vinegar
1 TBSP Brown Sugar


Next your going to have said BFF slime your hair with it. I'm not going to lie, this seriously gave me the heebs. It brought back not so fond memories of blow out diapers that resulted in entire wardrobe changes. 


My little guy Soren was NOT impressed, he kept saying, "No Cado!" 


We let it sit for about 30 min, we didn't have a shower cap, or even saran wrap. Nicole suggested Glad press and seal, but combined with a blow dryer I thought it was best to avoid the smell of melted plastic and hair...She might not invite me back.


Overall, when we were done we had mixed reviews. Both of us thought our hair was left feeling a little heavy. My ends however have not felt less crunchy. I wash my hair about every other day, so fast forward to day 3, my hair was amazing. For reals. It was shiny and soft, and all around fabulouuus. 6 days later my hair is still feeling and looking awesome. This will definitely be a repeat. Next time I will follow the directions a little closer and use the shower cap and blow dryer.


We both used this curling wand...


and I am firm believer in Wen products.


I hope you're not too weary to give this DIY Hair Mask a try. Let us know what you think. To stay updated with us, you can subscribe to our blog via the side bar. Just look for the mustache. ;)


Wednesday, April 24, 2013

The Ultimate Carrot Cake!


I am a Carrot Cake lover, it can't be just any carrot cake though. It has to be perfect. It can't be dry. It can't be soggy. I want to see the flippin' carrots...that IS why it's called "Carrot Cake", am I right? I tweaked this recipe until it is seriously a piece of perfection.


Personally, I am not into "commercial" holidays, it's just not my deal. Flowers die. I can buy chocolate anytime. That weird stuffed animal will end up in my Goodwill donation pile... 
And then there is  Mother's Day.  That my friends IS my deal.  That is my morning, noon, and night. I got sliced and diced 3 times in 3 years... I want some Carrot Cake, dang it. 

As a Mother it's so easy to focus on all the things that you aren't doing. Heck, in one day I think I am doing awesome and then 2 hours later I am a wreck and ready to call an exorcist. Being a Mom is no joke, it is the hardest, yet most rewarding thing I have ever done. One time a year there is a day dedicated to recognizing how utterly amazing we are. So sit back and enjoy it, you deserve it. I'll be smooching on my kids and eating cake. 


Cake Ingredients:

6 Cups Grated Carrots
1 Cup brown sugar
1 Cup raisins
4 eggs
1 1/2 Cup white sugar
1/2 Cup Vegetable Oil
1/2 Cup Apple Sauce (Cinnamon or Plain)
2 1/2 TSP Vanilla Extract 
1 Cup Crushed Pineapple, drained (save 2-3 TBSP of juice)
3 Cups All Purpose Flour
1 1/2 TSP Baking Soda
1/2 TSP Baking Powder
1 TSP Salt
2 TBSP Cinnamon
1/2 TSP All Spice
1/2 TSP Ginger
1/2 TSP Ground Cloves
1 Cup Walnuts

Directions:

***Note: You will need cheese cloth, and (2) 10" cake pans***

In a medium bowl, combine grated carrots and brown sugar. In another small bowl dump your 1 cup of raisins and cover with lukewarm water. This will make your raisins nice and plump. Allow both to sit for 60 minutes. Use cheese cloth to drain your carrots, this will keep your cake from being too soggy. Next drain your raisins and combine is medium bowl with carrots.

Preheat oven to 350 degrees. Grease and flour your cake pans.

In a large bowl, beat your eggs until light. Gradually stir in the white sugar, oil, apple sauce, and vanilla. Stir in the drained pineapple (use cheese cloth for draining these as well) plus the 2-3 saved juice. 

In a separate bowl combine flour, baking soda, baking powder, salt, cinnamon, all spice, ginger, and ground cloves. Stir into the wet mixture until absorbed. 

Next stir in the carrot mixture and the *walnuts (*optional- I don't put the walnuts in the actual cake, I like to have them on top of the frosting)

Pour evenly into your round pans.

Bake for 30-35 minutes. 

Allow your cakes to cool in pans for ten minutes, and then flip onto wire racks and let cool completely before frosting. 


Cream Cheese Frosting:

1/2 lb soft butter
(2) 8oz containers of cream cheese, also softened
2 lbs confectioners sugar
2 TSP Vanilla

Mix softened butter, cream cheese, and vanilla together in a mixer until nice and fluffy, slowly stir in powdered sugar. If the frosting is too stiff, stir in a tiny bit of milk until it is at your desired consistency.


Eat and enjoy!


Sunday, April 21, 2013

Crockpot Lasagna


This is yet another family favorite. It's so easy to make, I don't think I will ever return to making lasagna the "OG" way. I am all about keeping things simple.

So here ya go folks!

Ingredients:

1 lb Italian Sausage
1 Jar Spaghetti Sauce
1 Cup Water
1 15oz container of Ricotta Cheese
2 1/4 cups Italian Cheese
1/4 cup grated Parmesan cheese
1 egg
1 TBSP parsley
6 lasagna noodles

Directions:

Brown sausage in a large skillet, drain the fat, and add your spaghetti sauce and water. Let simmer for a few minutes.

In a small bowl mix together ricotta, egg, Italian and Parmesan cheeses, and parsley.

Now you going to start building your layers! First, add 1 cup of the meat mixture to the bottom of your crock pot. Cover with 3 lasagna noodles (you're going to have to break those bad boys up to fit), and then cover with 1/2 of the ricotta mixture. Next spoon 2 cups of the meat mixture on top, and cover with the remaining noodles. Top with remaining ricotta mixture, and spoon remaining meat mixture. Top with 1/4-1/2 cup Italian cheese. Cover with lid.

I usually cook mine on high for 2-3 hours, but you can easily adjust that to cook on low for 4-6. It is such a delicious easy meal!


Thursday, March 28, 2013

Baked Instead Of Boiled


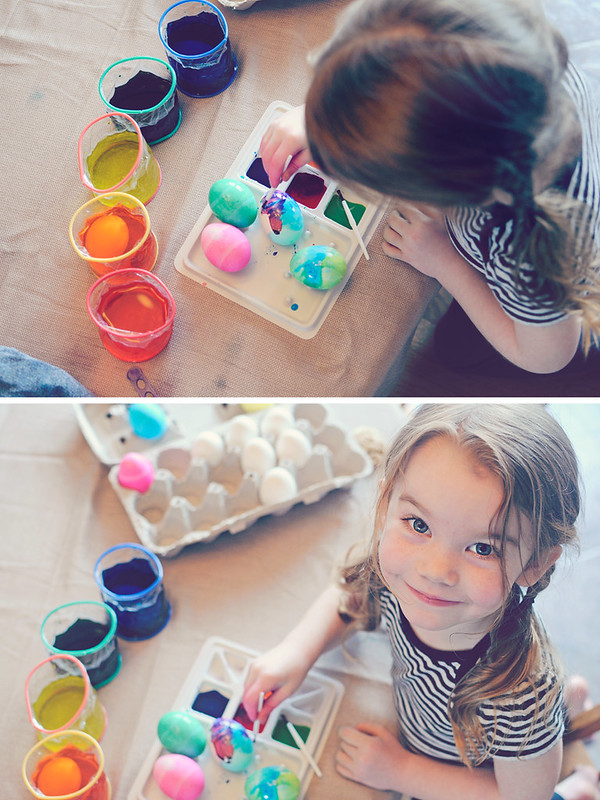
Just in time for Easter... I was able to try out baking eggs instead of boiling them. Something I found on Pinterest. Found here. I loved how they turned out! They peeled perfectly. I only had two slightly cracked eggs. Everyone should definitely give this a try. I actually prefer this method over boiling my eggs now!

Here is how you make them.

1st - place the eggs on the center rack parallel (as shown) with a cookie sheet underneath incase an egg cracks and oozes. I have not had one make a mess on me yet, but better to be safe then sorry!

2nd - Preheat the oven to 325 degrees and bake for 30 minutes. *Eggs go into the oven before you preheat so they will cook slowly*

3rd - place the eggs in a bowl of ice water when done to cool down. Wait about 10 minutes before peeling them. After you peel them place them back in the water to continue cooling.

Done! You should have some perfectly hard baked eggs. Try it, I dare you!


Aubri is my huge fan of eggs at home! I don't have to worry about them going to waste...

enjoying egg

You can use the baked method of eggs to make Deviled Eggs, Egg Salad Sandwiches (must see our awesome recipe HERE!), or decorate them with the kids for Easter! Basically, whatever you use boiled eggs for, you do the same with these baked ones!

My adorable Aubs had a great time decorating them for Easter!

colorful

Painting eggs


SUBSCRIBE (via our side bar) to our blog if you want to stay updated with all the fun things we have going on here and don't forget to be our fan on Facebook!


Thanks for stopping by!!!


Wednesday, March 13, 2013

Chicken Pillows | Recipes

When I went off to college, I wrote down a ton of recipes from my moms recipe box. This recipe was in that box. I don't ever remember my mom making them. She might have, but I don't think she did. How I even got the recipe in the first place, I have no idea. Its in a hand writing I don't even recognize. Maybe it ended up in my recipe box by mistake. I don't know, but I'm sure glad I decided to try it one day.

 Its a family favorite of ours! Your kids will love them and its one of my hubby's favorite dinner!


Chicken pillows is a very strange name for a recipe, but delicious all the same and very easy to make! You don't need a whole lot of ingredients which makes it very inexpensive. 

When choosing the crescent rolls, I go with the Pillsbury Big & Buttery. They are bigger and seem a little more fluffy. Its a win win in my book.


Chicken Pillows

Ingredients:
2 chicken breast (cooked and cut up)
1 - 3 ounce cream cheese
1 Tbs chopped onion
1-2 Tbs milk
1 package crescent rolls
2 Tbs melted butter
bread crumbs (optional, but highly recommended)

Sauce:
1 can cream of chicken soup
1/2 can of milk

Directions:
Boil chicken and cut up. Return to the pan and over medium heat add in the cream cheese, chopped onion, and milk. Stir until all the ingredients are combined and the cream cheese has melted into a sauce. Put a heaping Tbs on crescent and roll up, widest end to the smaller end. Pinch the dough together in places that have an opening. Melt butter and brush on top of the rolls and sprinkle with bread crumbs

Bake at 350 degrees for 20-25 minutes. Depending on your oven. You want the tops to be nice and golden. Pour the sauce over chicken pillows when serving. Enjoy!


When you are putting the tablespoon of chicken on your crescent roll, make sure you put it in the widest part of the triangle.

 When folding the crescent rolls up to resemble a pillow you want to bring the dough over the chicken and the two corners tucked in on the sides. Like the following...
Then all you have to do is bring the skinny end up and over the top. Make sure you pinch the dough together wherever you see some chicken exposed. 

 Then you are left with 8 chicken pillows! Super easy! Now all you have to do is brush some butter on top, sprinkle on some bread crumbs and toss it in the oven. 


This is what yummy goodness (as my 5 year old would call it) looks like when you sink your fork into it!

Enjoy!!!


Share the knowledge!