Thursday, March 28, 2013

Baked Instead Of Boiled


Just in time for Easter... I was able to try out baking eggs instead of boiling them. Something I found on Pinterest. Found here. I loved how they turned out! They peeled perfectly. I only had two slightly cracked eggs. Everyone should definitely give this a try. I actually prefer this method over boiling my eggs now!

Here is how you make them.

1st - place the eggs on the center rack parallel (as shown) with a cookie sheet underneath incase an egg cracks and oozes. I have not had one make a mess on me yet, but better to be safe then sorry!

2nd - Preheat the oven to 325 degrees and bake for 30 minutes. *Eggs go into the oven before you preheat so they will cook slowly*

3rd - place the eggs in a bowl of ice water when done to cool down. Wait about 10 minutes before peeling them. After you peel them place them back in the water to continue cooling.

Done! You should have some perfectly hard baked eggs. Try it, I dare you!


Aubri is my huge fan of eggs at home! I don't have to worry about them going to waste...

enjoying egg

You can use the baked method of eggs to make Deviled Eggs, Egg Salad Sandwiches (must see our awesome recipe HERE!), or decorate them with the kids for Easter! Basically, whatever you use boiled eggs for, you do the same with these baked ones!

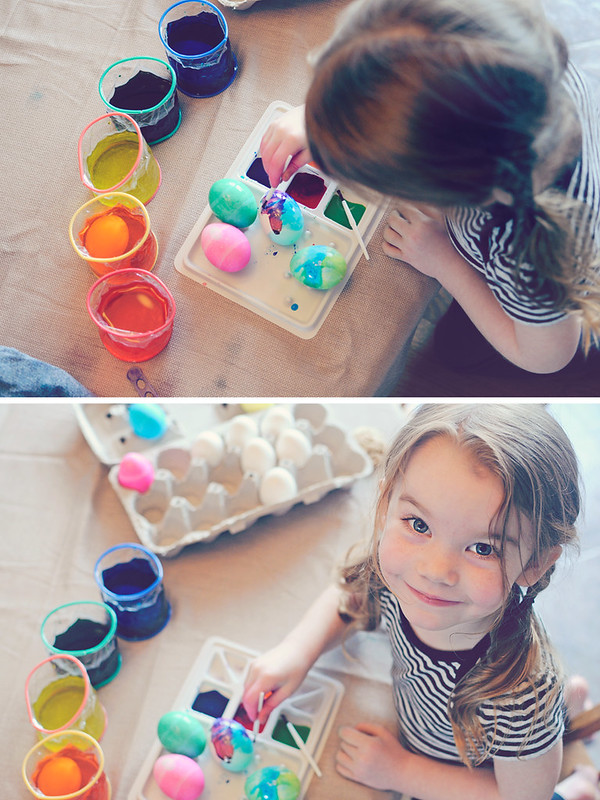
My adorable Aubs had a great time decorating them for Easter!

colorful

Painting eggs


SUBSCRIBE (via our side bar) to our blog if you want to stay updated with all the fun things we have going on here and don't forget to be our fan on Facebook!


Thanks for stopping by!!!


Wednesday, March 13, 2013

Chicken Pillows | Recipes

When I went off to college, I wrote down a ton of recipes from my moms recipe box. This recipe was in that box. I don't ever remember my mom making them. She might have, but I don't think she did. How I even got the recipe in the first place, I have no idea. Its in a hand writing I don't even recognize. Maybe it ended up in my recipe box by mistake. I don't know, but I'm sure glad I decided to try it one day.

 Its a family favorite of ours! Your kids will love them and its one of my hubby's favorite dinner!


Chicken pillows is a very strange name for a recipe, but delicious all the same and very easy to make! You don't need a whole lot of ingredients which makes it very inexpensive. 

When choosing the crescent rolls, I go with the Pillsbury Big & Buttery. They are bigger and seem a little more fluffy. Its a win win in my book.


Chicken Pillows

Ingredients:
2 chicken breast (cooked and cut up)
1 - 3 ounce cream cheese
1 Tbs chopped onion
1-2 Tbs milk
1 package crescent rolls
2 Tbs melted butter
bread crumbs (optional, but highly recommended)

Sauce:
1 can cream of chicken soup
1/2 can of milk

Directions:
Boil chicken and cut up. Return to the pan and over medium heat add in the cream cheese, chopped onion, and milk. Stir until all the ingredients are combined and the cream cheese has melted into a sauce. Put a heaping Tbs on crescent and roll up, widest end to the smaller end. Pinch the dough together in places that have an opening. Melt butter and brush on top of the rolls and sprinkle with bread crumbs

Bake at 350 degrees for 20-25 minutes. Depending on your oven. You want the tops to be nice and golden. Pour the sauce over chicken pillows when serving. Enjoy!


When you are putting the tablespoon of chicken on your crescent roll, make sure you put it in the widest part of the triangle.

 When folding the crescent rolls up to resemble a pillow you want to bring the dough over the chicken and the two corners tucked in on the sides. Like the following...
Then all you have to do is bring the skinny end up and over the top. Make sure you pinch the dough together wherever you see some chicken exposed. 

 Then you are left with 8 chicken pillows! Super easy! Now all you have to do is brush some butter on top, sprinkle on some bread crumbs and toss it in the oven. 


This is what yummy goodness (as my 5 year old would call it) looks like when you sink your fork into it!

Enjoy!!!


Friday, March 1, 2013

Egg Salad BLT's

I thought I would be really clever and come up with a double whammy of a blog post. Riiiggghhht, not so much. Have you seen the so cute, gotta try it, kids would love it, dying eggs with whip cream? Me, too! Well, let me just say, pinterest FAIL. Mine ended with my kids eating eggs, er, egg shells and rainbow stained hands, hair, and teeth. I think we might try it again, like never. Do you have a pinterest fail story? I'd love to hear it. Head on over to our Facebook page and share it with us. The entry with the greatest fail will win a $20 gift card to Amazon from yours truly. Oh, and "like" us, because we are pretty awesome.

My hubby is a man of simple taste buds, eggs are a staple in a house. Egg sandwiches, fried eggs, hard boiled eggs, breakfast for dinner, you get the idea? He also loves BLT's, so I decided to marry his favs.


Ingredients:

- 8 slices Sour Dough Bread
-Mayo... or are you a miracle whip fan?
-Tomato
-Lettuce
-Bacon...buy the center cut kind, nothing is worse than fatty rubbery bacon.

Egg Salad:

-1 dozen eggs... We bake ours.
-1/2 cup onion
-1 stalk celery
-1/2 cup mayo
-2 TBSP relish
-2 TBSP mustard, I use honey mustard
-1 TBSP lemon juice-Salt and pepper to taste

Dice up your eggs. My sister Dana, who makes a mean potato salad taught me to do this with a spoon, seriously best trick ever. Mix together remaining ingredients.


Directions:

Skip the "I'm going to be the cool Mom and dye eggs with the kids" part. Ok?
Whip up your egg salad, and stash in the refrigerator so it can set up a bit. Fry up your bacon, and toast your bread. For extra yumminess I turn my oven onto broil, put a layer of mayo on my bread and toast it that way, soooo good. Just keep an eye on it until it is to your personal golden perfection. Next slice up all your goodies and put your egg salad on your sandwich. Easy peasy!

I hope you enjoy this recipe!


Vegetarian 4 Bean Enchiladas

I'm baaaaaaaack. Whew, it's been a whirl wind of a month, and it doesn't look like it's going to ease up for another month or so...aye!
I recently had the opportunity to take a meal to a friend, her husband is a vegetarian so I was struggling a bit to come up with something that would be easy to transport and delicious...it's harder than it sounds. I did some searching on pinterest and found this recipe. I made some alterations to make it vegetarian friendly, and it turned out great. I made two since we needed dinner too, haha.., my in-laws were visiting, and it's hubby and FIL approved!


I served it with a salad, and Zatarain's (love them) spanish rice. 

Ingredients:

-10 Tortillas (Nicole and I both prefer Mission brand)
(all beans are 15 oz cans)
- 1 can red kidney beans rinsed and drained
- 1 can garbanzo beans rinsed and drained
- 1 can black beans - drained
- 1 can great northern beans rinsed and drained
- 1 can (10.75 oz) Campbell's Fiesta Nacho Cheese
- 1 can whole green chilies (you will get more flavor if you dice these bad boys up yourself, or go ahead and buy the diced ones)
- 1/3 cup chopped onions (optional)
- 1 can enchilada sauce (pick your flava)
- 1 1/2(+) cup shredded Mexican blend cheese (Am I the only one that doubles the amount of cheese called for...I hope not)

Directions:

Preheat oven to 350 degrees.
Combine beans, soup, onions and chilies in bowl. Put a thin layer of the mixture on the bottom of a 13x9 inch casserole dish. (I used the foil kind for delivery) Spoon about 1/2 cup filling onto each tortilla. Roll tortillas up and put into pan.
Spoon on your enchilada sauce so that it covers all of the tortillas. Cover with foil. Bake for 30 minutes. Then take out and sprinkle with cheese. Put it back into the oven until cheese is melted... about 10 minutes. I like it when the edges of the tortillas are crunchy.


Share the knowledge!