Wednesday, April 25, 2012

Spring Happenings...

April has been a busy month and I'm behind on my blog...

Spring finally came! Since we bought our home last September we haven't experienced spring or summer in our house. I was pleasantly surprised at how beautiful our tree in the front yard looked after it bloomed!

Blooms

And finding more plants popping up out of the ground that I didn't know were there. Like the Peonies!!! I can't wait until they bloom!

plants


One of the first things that happened for us in April... we FINALLY have an oven! Yeah! A couple of posts back I blogged about the ice/snow storm we had. When we finally got power back after a few days, with it went my double oven. It fried the electrical panel somehow... not sure how, but it did. :(

So after 2 months of working with the home warranty company and not having an oven, (crock pot meals were a great replacement) they finally shipped us the replacement. We waited another "3 weeks" to get someone out here to install it. I know... ridiculous! We finally got two repair guys (who were short a few bricks) to install the double oven and I had to point out to them, while they were hooking up the electrical, that it was too tall for the wall. Oh... hmmm... interesting. We were told on the phone by the warranty company that it was our fault that we didn't go down to an appliance store after they gave us the model # to make sure it was a right fit for our space. I'm sorry, no one told me I was suppose to do that. My incredibly handy, sexy, smart hubby took matters into his own hands and popped off the molding, lowered a shelf, put everything back together, hooked up the electrical and with my muscles we were able to lift and slide the oven into place. PERFECT! Whew! I can bake again!!!

The best part of the whole thing, my hubby had a little helper (screw driver in hand) that just had to help his dad the whole time. I love having fixing men in my house!
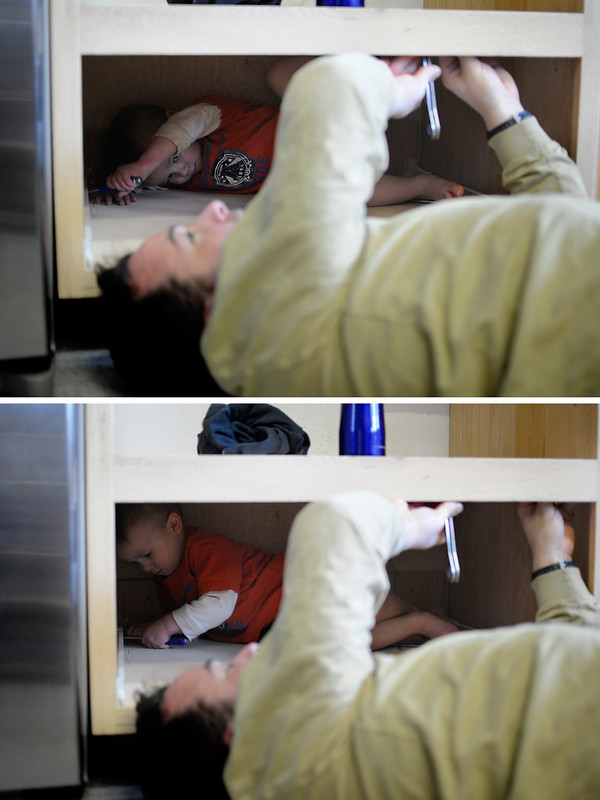
helping dadda

Just in time for Easter... I was able to try out baking eggs instead of boiling them. Something I found on Pinterest. Found here. I loved how they turned out! They peeled perfectly. I only had two slightly cracked eggs. You should try it sometime.

Here is how you make them.

1st - place the eggs on the center rack parallel (as shown) with a cookies sheet underneath incase an egg cracks and oozes. I have not had one make a mess on me yet, but better to be safe then sorry!

2nd - Preheat the oven to 325 degrees and bake for 30 minutes. *Eggs go into the oven before you preheat so they will cook slowly*

3rd - place the eggs in a bowl of ice water when done to cool down. Wait about 10 minutes before peeling them. After you peel them place them back in the water to continue cooling.

Done! You should have some perfectly hard baked eggs. Try it!
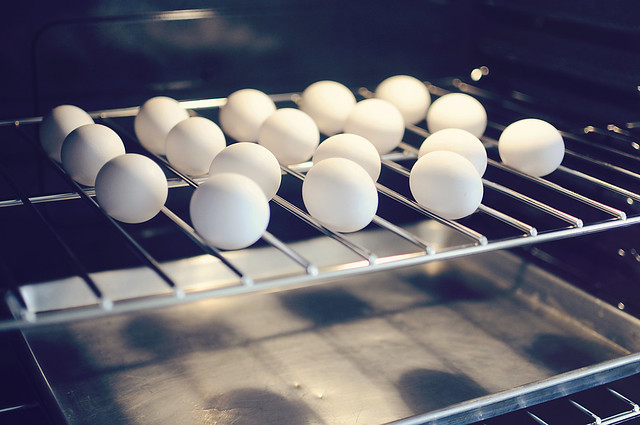

_DSC9626

Aubri LOVES boiled eggs. Something I never thought she would like, but she does. The kid surprises me all the time.

enjoying egg

My little Timmy boy is still too destructive to trust with cups full of dye and the eggs themselves. So, while he took a nap, Aubri had some fun being creative. She had a blast decorating eggs this year.
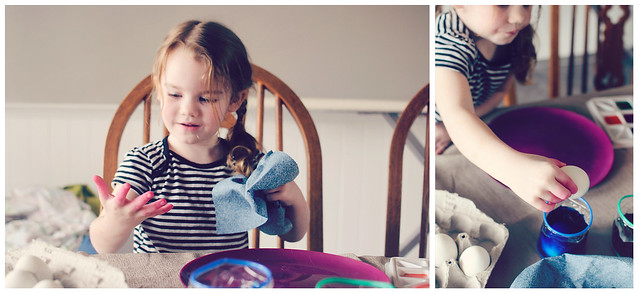
dye

colorful

Painting eggs

********************************************************************************

The day before Easter Sunday we headed down to Grandma & Grandpa Jones'. The kids had a big Easter egg hunt with their cousins. There were way too many eggs, but it was a fun experience.

Tim was suppose to be helping hide the eggs but I caught him eating them instead...

sneaky tim

It didn't take Timmy long to figure out what he needed to do.

run for basket

This was Aubri's "please, no pictures" moment. She was too busy finding eggs.

_DSC9739 bw

Most of the little cousins taking a break playing dress up and jumping on the trampoline.

_DSC9830

Timmy & Soren enjoying the gravel pit together.

_DSC9806

This is sweet "tiny" Farah! Newest addition to our Nephew Cody & his wife Saydee. She is such a sweet sweet baby.

_DSC9784

Lots of grub to be had.

_DSC9890

And Timmy melting my heart with his charming good looks.

_DSC9929

I was there too... sometimes I forget to put myself in the memories. I thought I looked cute that day but all I have to show for it is a mug shot of me and the hubs. Literally. I really need to be more creative on self portraits and getting my hubby to take his sunglasses off...


_DSC9910

Wednesday, March 14, 2012

Refurbishing | Being Creative

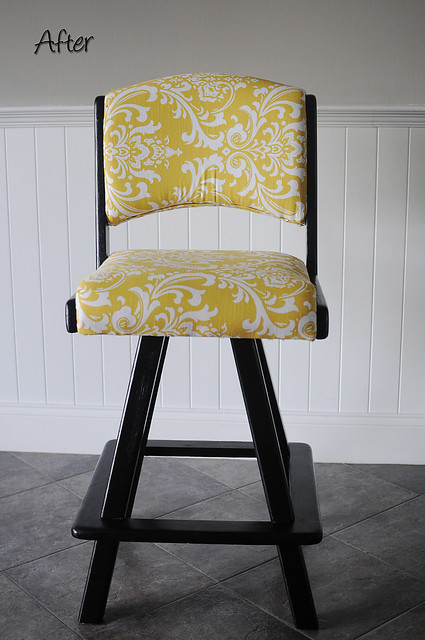
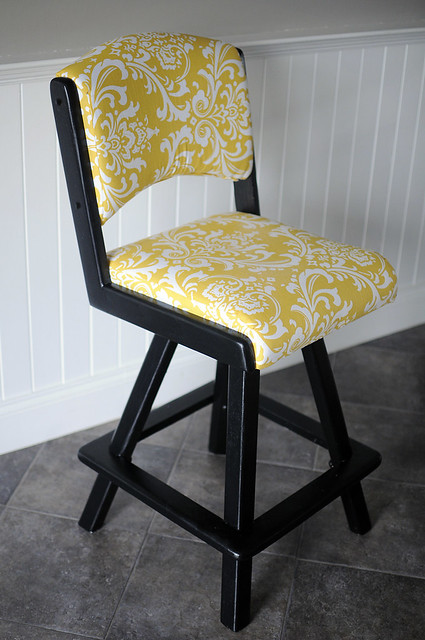
When we bought our house, it came with some "lovely" bar stools. Are you sensing a bit of sarcasm? It's there. I was immediately on the look out for some new ones. Little did I know, they would cost more than I'm willing to spend for a flippin chair. My husband also argued the point that the chairs we inherited with the house swivel (ooh ahh!). Hence the idea of flipping the chairs...

Here's the "lovely" before it got flipped:
_DSC9347

And here's the flipped chair:
_DSC9351

_DSC9354

_DSC9358

_DSC9357

_DSC9355

_DSC9359

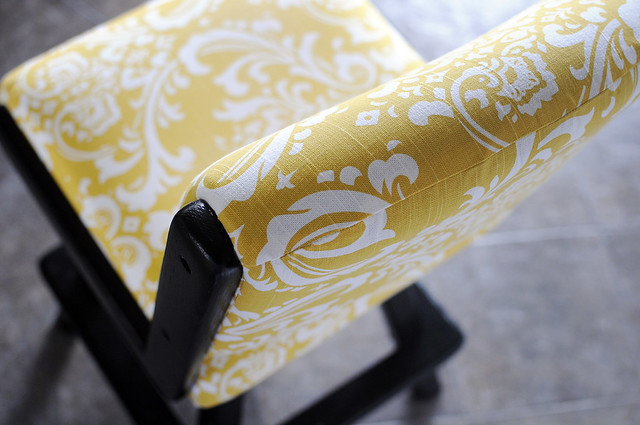
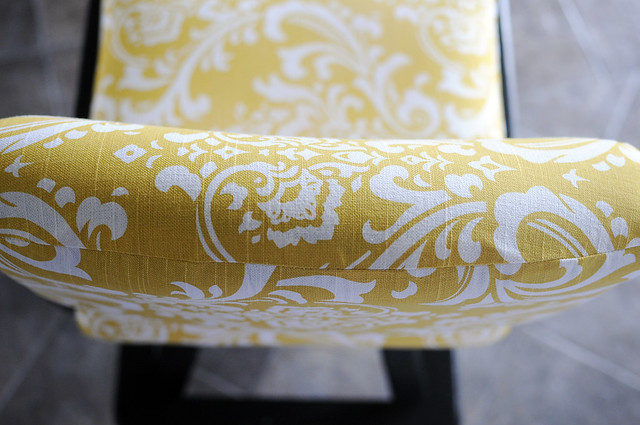
What do you think? HUGE improvement I would say. Even though it took me a while to finally get the chair done (I had some issues with my sewing machine). It was worth it. When I say "the" chair, I mean only one has been finished. I still have 3 more to go. Now that I've gone through the whole process, it should be easy finishing the rest.

I went to the Fabric Depot in Oregon for that fabric. My sis-in-law Lurlyn and I love to shop there whenever we have an itch for a project. I don't remember the name and maker of the fabric, but if anyone needs to know, I'm sure I can do a little research.

I originally painted the legs and arms white to go along with the fabric but it didn't have enough contrast or kick that I was looking for. So I thought to go black but was fretting that it would be too much. So I asked Lurlyn (who's opinion I trust whole heatedly because of similar taste) and she said to go for the black. Plus it would hide dirt or sticky fingers from my kiddos. I'm so happy I did! I love it! Thanks Lur! ;)

Projects like this can be easy if you use the original fabric from the chair as the pattern and really make notes of how the chair was put together originally. I did make a couple of mistakes that are only visible to me, but will make sure to do it better the 2, 3 & 4th time around.

Just for giggles and because I'm so proud of myself, here is another before & after pic side by side. :)

PTM Storyboard 2 Up


Saturday, February 25, 2012

January Weather | Part 2

Here is the sequel to my previous post.

The day after the snow... we got ice. It doesn't sound that bad, but when you add freezing rain on top of 6 inches of snow, its bad! First thing that morning, I was getting cereal for the kids and realized how "pretty" everything looked outside. Wow! Look at all the ice on everything! So I headed outside with my photo gear in hand. Snap snap snapping pictures... gee, this is great! Moments later I hear crashing sounds. Then I hear more crashing. Then I look over in my neighbors back yard at the very moment a huge branch from their tree comes crashing down. Thats when it all changed in my mind. I headed back inside to discover the power was out. Out out out... for 3 days! *that is the longest I've ever been without power.

The first day without power was fun. The kids and I grabbed the guest room mattress and Timmy's twin mattress and we made some beds in our living room where our gas fireplace was. Thankfully we had a gas fireplace or we would have been freezing! We played games, puzzles, built a tent, read stories, played with flashlights, watched movies on Daddies laptop after charging it in the car, ate lots of fruit and peanut butter and jelly sandwiches, lit candles, cleaned up messes, made more messes... and on and on.

Day two... we were getting a little stir crazy. For some reason, when your power goes out, time slows way down. Go figure. Tim decided it was time to fire up our generator. Thank goodness I have a smart husband who thought it was important to own a generator. We were able to run our microwave and oven and have some important lights on in the house at night. Tim and I played a few rounds of Sequence. Its our favorite game to play together.

Day three. I'm done. I had to get out of the house. I ran to Costco with the kids. Costco didn't even have power. They were running their lights and registers on generators but it was freezing in Costco that day. Grabbed some important essentials... Doritos, muffins, fruit... ya know... the healthy stuff. ;)

Day four. We finally got power back on at 3 pm! Yippee!!! Life is back to normal!

Our family learned a valuable lesson. Food storage and 72 hour kits are very important! Anything can happen at any time and we need to be prepared. So important! Here's the pics I took during our crazy weather:

_DSC8921
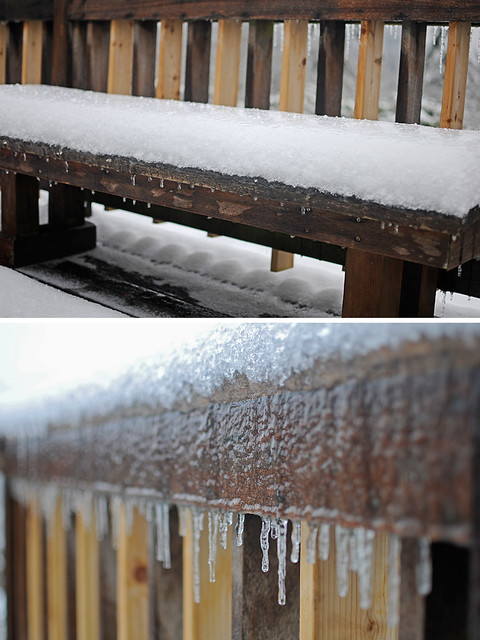
I don't know if you can tell by the picture below, but the snow on our bench is complete ice. Imagine that sitting on top of tree branches.
frozen 2
frozen 3
The thick layer of ice I peeled off of one of the Rhododendron leaves.frozen 1
frozen 4
My cute boy trying to read a story and Aubri was being a bit crazy! Can you tell by the expression on her face?
crazy double 2
Getting a bit bored!
crazy double
A little hide and seek anyone? Even our dog was getting in on the action.
double crazy 3
Our wintery view. The branches on the trees are usually horizontal. The tree on the left is missing all of the branches in the middle now. Poor tree.
_DSC8951
Hubby getting the laptop ready for us to watch a movie. :)
_DSC8956
Watching our movie... I think it was Winnie the Pooh?
_DSC8960
The view of the power lines and the trees with all the ice.
_DSC8964
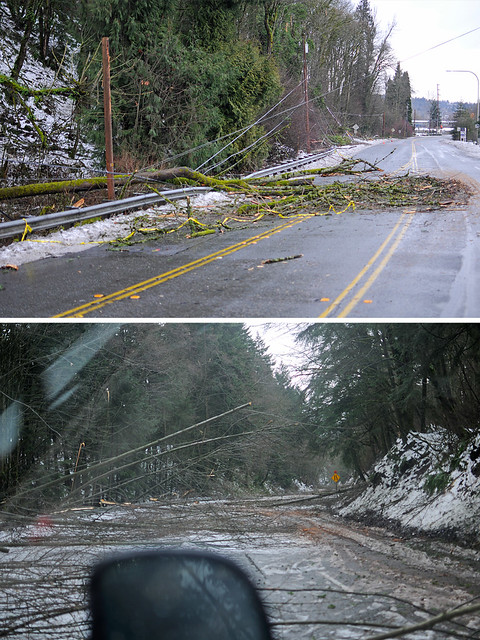
Tim took us for a drive to see some of the roads closed due to fallen trees and power lines.
damage 1

I'm sad our city lost lots of beautiful trees. Even the park where I took these pictures. So sad but I'm glad its over and just a memory now.

Sunday, February 19, 2012

January Weather | Jones Style

I'm slacking on my blog and needing to catch up. January was an interesting month. Seemed to have gone by pretty quick. But not without a little snow and ice.

The Day of the Snow...

Poor Timmy fell and didn't know what to think about the cold snow on his hands.
_DSC8859

_DSC8841
Making a snow ball to throw at her brother. 
_DSC8866
Snow Angel time!
_DSC8889
Those eyes!
snowy 2

snowy 4
Timmy's favorite... the spider boots. Thanks Lur! ;)
_DSC8874
She's busy concentrating on building a snow castle!
snowy5

snowy 3
His mischievous look. I love this boy!
_DSC8896

snowy 1

_DSC8915

**My next post... the day after the pretty snow, ice rain. 

Saturday, January 14, 2012

Chicken Enchiladas on the menu!

I'm feeling in the sharing mood today since I have attracted a few new readers to my blog via a post I did here. People are pinning it on pinterest like crazy and I feel honored! I've also received tons of really nice emails about my style of photography. It's all definitely giving me a boost in my self esteem, so thank you all! I really appreciate it!

I was reminiscing with my hubby the other day about my ability to cook in the past, or lack thereof. There were only 2 meals I made good: spaghetti (out of a jar, lol) and chicken enchiladas. My excuse, I worked all day and had a lack of energy to really care about cooking that well. That has all changed since I had my first baby and became a stay at home mom. I now had time to devote to trying new things. I love finding new recipes and sort of making them my own by omitting something or adding something. Cooking is now fun for me. I absolutely love pinterest and all the recipes I find on there that I have to make at least once. So now I want to share a recipe of mine that you have to try at least once. You won't regret it! 

Creamy Chicken Enchiladas!

Ingredients:
1 lb boneless skinless chicken breast - cooked and shredded
1 package of mexican style shredded cheese
1 can whole chilis (dice them)
2 small cans sliced olives
5-6 green onions diced up
2 cans cream of chicken soup
1 cup sour cream
10-12 mission flour tortillas

Preheat oven to 375

Combine cream of chicken soup with sour cream in a bowl. In a 9X13 inch pan (preferrably glass), put a thin layer of soup mixture on the bottom. With your spatula, swipe a thin layer of the soup/sour cream mixture across the middle of the tortilla and then you can start layering on the following ingredients: shredded chicken, olives, green chile, green onions and cheese to top it off. Roll up and put in pan (seam side down). Continue until pan is full. Pour the left over soup and sour cream mixture over enchiladas and spread evenly with a spatula. Layer with cheese on top. Cover with foil and bake in the oven at 375 for 15-20 mins. Check it at 15 mins... if its bubbling, its good to go!

I love to serve them up with some spanish rice and a salad. YUM!


Tips & Tricks:

**To make your chicken more flavorful, if you don't already do this... cook it in your saute pan with some chicken broth. Make sure to salt and pepper your chicken to your liking.

-Something I learned from Pinterest that helps make this recipe go faster is shredding the cooked chicken in your Kitchen Aid. Great tip! 

-Also, I've learned over the years to buy the can of whole chili's and just dice them myself. I found I would get pieces of skin in the already chopped ones and I hate that! Cutting the whole chili's makes it so I can prevent anyone from getting the skin in their enchilada. Blah!

-My last and final tip to make these enchiladas the bomb is to buy the Tillamook mexican shredded cheese. I actually haven't been able to find it in the store ever since I lived on Orcas Island. Their mexican shredded cheese was so good because they had some pepper jack shredded up with the other cheese. Yum! I just buy the regular blend of mexican style shredded cheese because its more mild for my kiddos to eat. Still delicious! 

P.S. This recipe is meant to be made with cream of chicken soup. Don't substitute with cream of mushroom. blah!

Enjoy!


Share the knowledge!